Comment on Episode #144.
Annotations
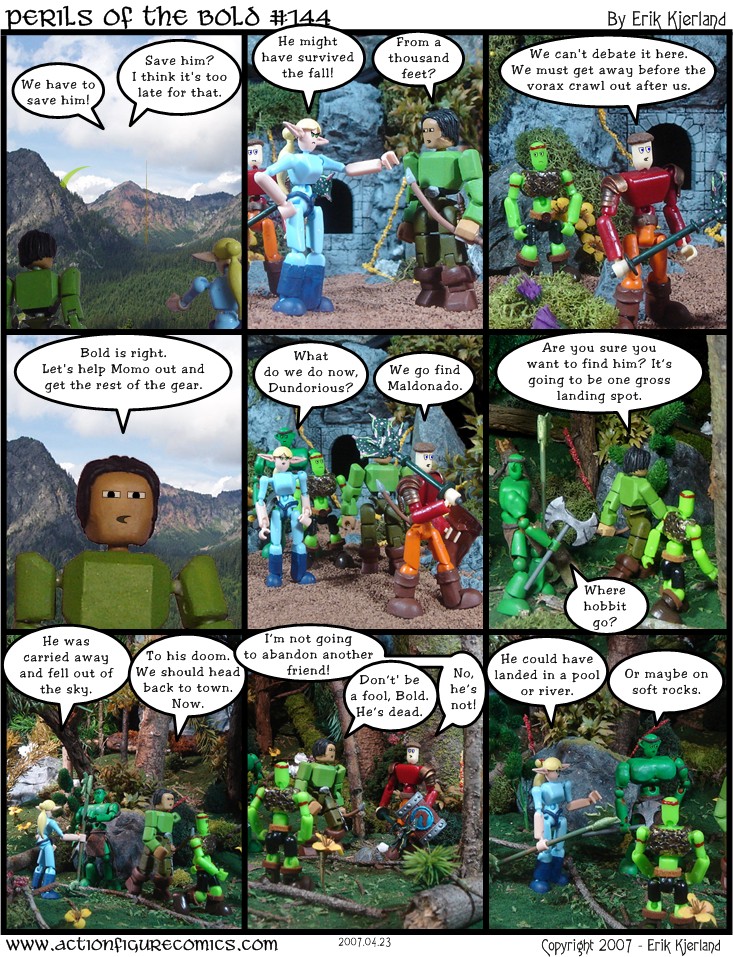
Panel #1 - Aahz told me about Photoshop's background eraser tool, of which I was previously unaware. It makes the greenscreen work go a bit faster, which is quite a relief. Thanks, Aahz!
Panels #2, 3, and 5 - And here we have the last few panels of the dungeon window exterior. I took these photos a few weeks ago when that set was still up. It's been dismantld for a while now. That's one bad thing about the heroes getting outside - replicating previous and dismantled sets is going to be virtually impossible. This is because there are a lot more decorations for exterior sets - dirt, rocks, branches, trees, flowers, vines, debris, etc. It's not just a floor and a couple walls that I can put back up with no problem. Therefore, I have to know exactly how many panels are going to use any exterior set and take all the shots while I have it up. Unfortunately, I don't have a dedicated studio room where I can leave sets for extended periods. At most, I can probably leave a set up for about a week before I have to dismantle it due to guests or general cleaning.
Panel #6 - TheDor on the Stikfanatics board reminded me that this is episode #144 - one gross. I figured I'd have to mention it in the comic somehow. ;)
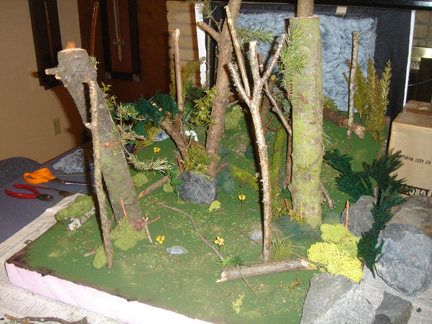
Panel #6 through 9 - Here is my first attempt at a full blown exterior forest set. It came out very good! Here's how I did it:
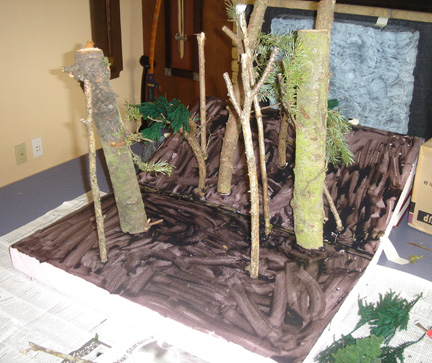
First, I cut some 2" think insulation foam into two smaller pieces. One I laid flat on the table, the other I put at an angle behind the first one to simulate rising ground - the heroes are in the mountains, after all. Then, I used branches (which I harvested from my front yard after the Seattle windstorm last December) and twigs and used them as trees. I used some real rocks and some fake rocks for boulders.
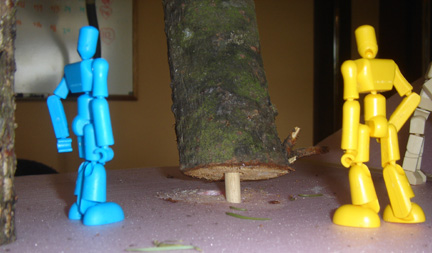
To get the branches to stand up, I drilled a hole in the end and inserted a dowel. Then, I melted a hole in the foam.

Here you can see the doweled tree branch being inserted in the foam. Using this system, I can move the trees around wherever I want just by pushing the dowels into the foam. I can use some masking tape to cover up the old holes. After doing this for a while, I'll have to replace the foam because it'll start looking like Swiss cheese. Luckily, such foam is cheap (I got mine from Home Depot).
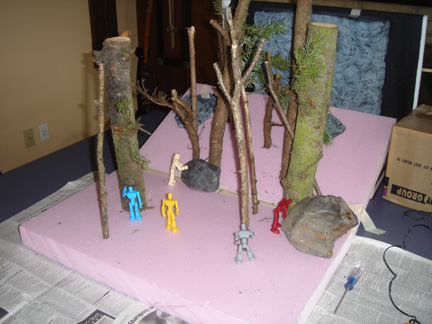
After setting up several trees I realized that the pink foam wouldn't make a very good base color for the ground. So, I painted it with black paint. I didn't worry much about getting it even, as it was going to be beneath the turf. I just wanted to make sure that if I missed some spots the bright pink foam would not show through.
Next, I spread some Woodlands Scenics Fine Turf Weeds T1346 over the foam. This looks way to plain and boring here.
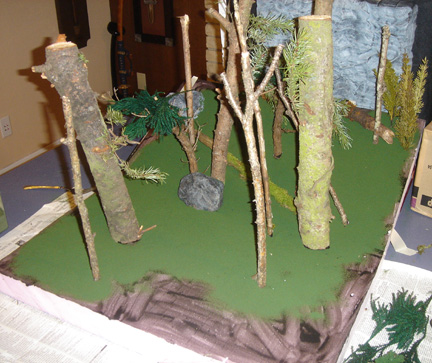
So, I added some more decoration. Lots of Woodlands Scenics moss for bushes, some lighter colored turf, crumpled up twigs for fallen branches, moss-covered branches I collected from outside, a bit of dirt, and some McCormick Gourmet Collection Parsley Flakes for fallen leaves. The flowers and other plants are floral decorations I got at JoAnn's or Michael's craft stores. The neat thing about the foam is that I can poke a hole in it with a toothpick and stick a flower into the hole, or use a pencil to poke a larger hole for a sapling. The lighting here with the camera flash is pretty bad, but you can see the end result in the comic. Looks pretty darn good! I'm going to dread dismantling this set, which I must do Tuesday morning. However, this was a great success for my first attempt. I'm looking forward to making more forest sets.